
How to create a System Restore Point in Windows 10?
A System Restore Point in Windows 10 is a feature that backs up your system files and settings in case something goes wrong. This system restores feature is the true system tool because so many features are removed from Windows 10 and some new features are added but system restore tools still exist. If you want to take your computer back to an earlier point in time then you have to create the restore point. When you install a new application or driver, system restore points are auto-generated and you can also create the restore point manually in your computer windows.
After the restore point was made, the system restore will remove applications, drivers, and updates installed but the best thing is that it won’t affect your personal file and directories. Although that is a beneficial restoration tool, System Restore comes disabled through default, which means that you need to permit it earlier than the device can keep repair factors mechanically or manually through you.
Note: It will take time to repair the device from a repair point, so please make certain that the AC adapter is hooked up at some stage in the repair process. Also, please do now no longer pressure to close right all the way down to save you any issue. This blog will go over the Step-by-Steps to create a system restore point for your Windows 10 PC.
How to Create System Restore Point
There are three ways by which you can create the system restore point in your system or PC. Creating the system restoring point is a very important part if you want to take your system back to an earlier point in time. This system restores points that can also be created automatically.
Three ways of creating a system restore point are:
- You can create a system restore point with the help of System Properties in Windows 10.
- You can create a system restore point with the help of Command Prompt in Windows 10.
- You can create a system restore point with the help of PowerShell in Windows 10.
For more details on how to use these above-mentioned tools, you have followed the step accordingly.
How to create a system restore point from System Properties in Windows 10
Using the system properties you guys can create the system restore point in two ways: automatically and manually. Below we have described both ways in detail.
1. Enable System Restore in Windows 10
Now we enable the system restore setting automatically in Windows 10. By this, you can restore the backup without setup the restore points on your PC windows 10.
Follow these steps to set up the system restore point automatically:
- First, click on the search button in the taskbar.
- Then type “Create a restore point” in the Windows search bar then click on the “Open” tag.
- Now you’ll see a new window will open, in this window you need to click on the “System Protection” label button.
- Below you see the Protection System label under the available drives. The drive-in which you have installed your window drive shows the “ON” tag then which means the system restore point is enabled.
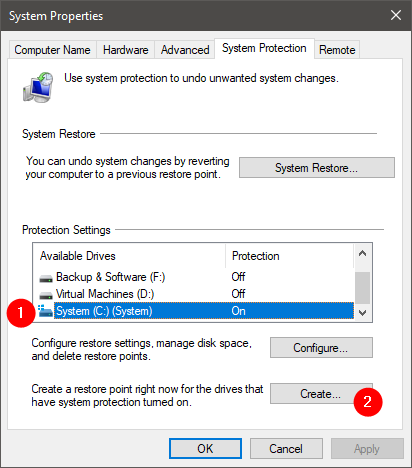
- The drive which you have installed your window if that drive shows the “OFF” tag then please choose the “System Drive” and then click “Configure”.
- Now you see a new window, in this window select the “Turn on system protection” and set up the Max Usage of disk space.
- In the last, you need to click on the “OK” button and now “System Restore Point” will be enabled.
Note: We suggest you set the Disk Space Usage ranging from 5% to 10% because the Max Usage will remain the disk space you set and is used for System Restore Point. As space fills up, older restore points will be deleted to make room for new ones.
2. Manually create a System Restore Point in Windows 10
Follow these steps to create a system restore point manually in windows:
- First, click on the search button in the taskbar.
- Then type “Create a restore point” in the Windows search bar then click on the “Open” tag.
- Now you’ll see a new window will open, in this window you need to click on the “System Protection” label button.
- After this, you have to click on the “Create” button at the bottom-right of the window box.
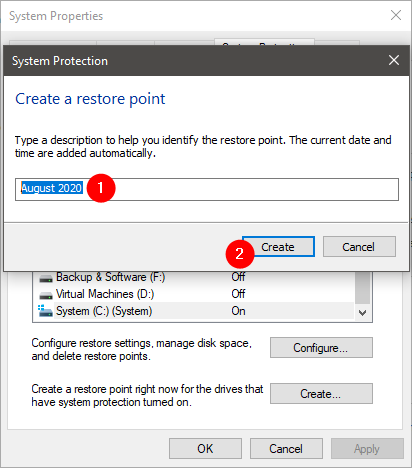
- Now you’ll see a new window will open, in this window you have to type a description into the input box like “2021/10/30 Create a restore point manually” to help you identify the restore point, and again click on the “Create” button.
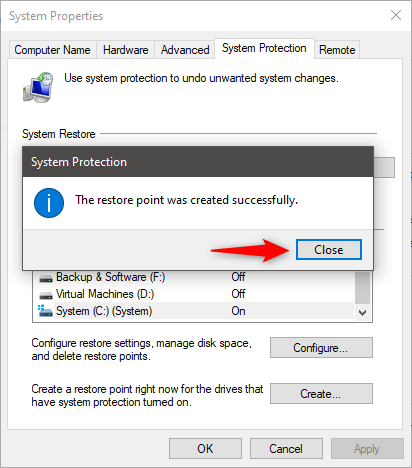
- When you finished the above-mentioned steps, you receive a message “The restore point was created Successful” in another window box and it means the restore point is successfully created, then please click “Close”.
How to create a system restore point from PowerShell in Windows 10
You can also create a system restore point from PowerShell in Windows 10 or other windows. For that you just need to follow some steps accordingly:
- First, Launch PowerShell as admin.
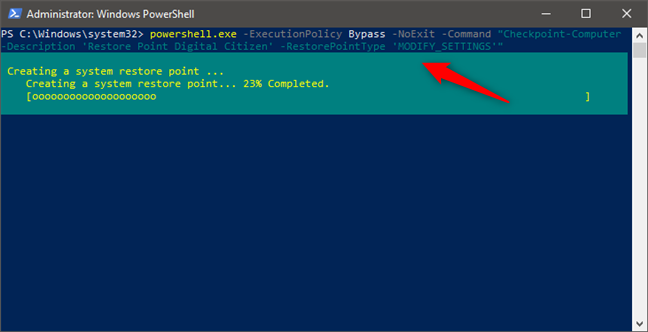
- After that, there is a command that you need to run in the PowerShell Admin. The command is: powershell.exe -ExecutionPolicy Bypass -NoExit -Command “Checkpoint-Computer -Description ‘Restore Point Name’ -RestorePointType ‘MODIFY_SETTINGS‘”.
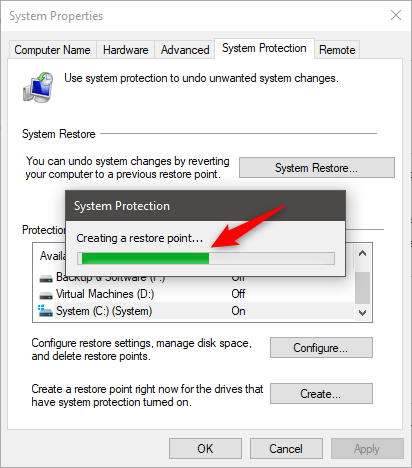
- After running the command PowerShell shows a text-based progress bar. After completing the progress bar you have to close the PowerShell Admin window in your system. The progress bar tells you how the restore point creation process goes.
Note that for your manually created restore point, you can set any name you prefer, by replacing the ‘Restore Point Name’ part of the command.
How to create a system restore point from Command Prompt in Windows 10
If you are more comfortable with Command Prompt you can also create restore points by using the command prompt, it is the simple and quickest way to do it. Go to the search bar, type cmd then click on Run as administrator. After the opening of Command Prompt run the given below command.
wmic.exe /Namespace:\rootdefault Path SystemRestore Call CreateRestorePoint “Restore Point Name”, 100, 7
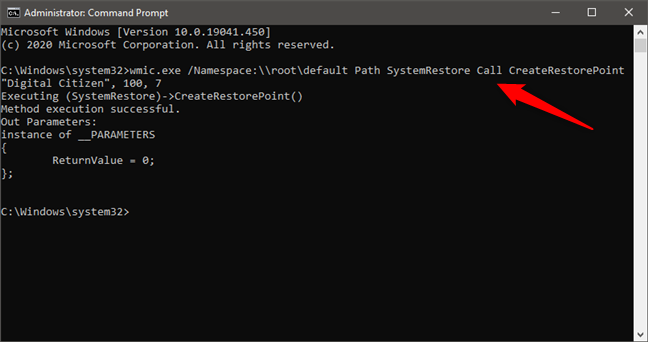
Now from the command, you have to change the “Restore Point Name” what you want to like you can write. If you get the output “Methode execution successful” and “ReturnValue = 0”, It indicated that the system restores the point created successfully.
How to restore your system from Restore Point
After creating the system restore points you can restore your system very easily. It is the best way to restore the system without creating any backup. Creating a backup is also a time taking process or money. But using system restore points you can get back to an earlier point in time.
Follow these steps to restore your system from the system restore point manually in windows:
- First, click on the search button in the taskbar.
- Then type “Create a restore point” in the Windows search bar then click on the “Open” tag.
- Now you’ll see a new window will open, in this window you need to click on the “System Protection” label button.
- After this, you have to click on the “System Restore” button.
- You need to click on the “Next” button at the bottom-right of the window box.
- Now you’ll see a new window will open, in this window from the list of the results “Select the restore point that you want to use” then click on the “Scan for affected programs”.
- And if in case, the points you want to use are not available in the result list then the “Show more restore points” check box to see more restore points.
- Now you see a new list of items, that will be deleted if you restore to this restore point. Click on the “Close” button to continue the next step if you are ok with the deletions. To select another restore point, you can also go back to the previous step if the restore point doesn’t meet your requirement.
- Click on the “Next” button.
- Before clicking on the “Finish” button please confirm whether your restore point information is correct or not.
- Now a new pop-up window box will open, in this window box, you have to click on the “Yes” button to start restoring the system from the restore point. And remember that after clicking on the yes button your computer will restart automatically.
- After your PC restarts, you will receive a message from the window side “System Restore is completed” and please click to move forward “Close”.
Note: Always make sure that during the restore process the AC adapter is connected because it will take some time to restore the system from a restore point. And to prevent the issue never force your system to shut down.
When should you create restore points?
A splendid time to create a repair factor is right away after you’ve got mounted Windows 10 for your pc or device. Only then must you move in advance and defloration your apps, drivers, extrude your settings, and so on. When you’re done, if the entirety works correctly, you must make some other repair factor to apply later on, in case you come across problems.
Another appropriate time to create guide repair factors is earlier than putting in apps from untrusted sources (that you should not be doing anyway), which could motivate issues.
Conclusion
Creating a system restore point is a good way to restore your PC to a previous working state. It can also be used to create a snapshot of your system before installing a new program or driver or making a significant change to your system. Here’s how to create a system restore point in Windows 10 and how to restore your system from restore point in Windows 10.
We have discussed the three-way by which you guys can create the system restore points in Windows 10. But from all of these the best and easy way to create a system restore point from System Properties. Using this is very simple. So, we suggest you use system properties to create system restore points in your system. As always, if you have any questions, feedback, or suggestions, please don’t hesitate to reach out to us! Thank you for reading, and have a great day!
We hope you enjoyed our blog post about how to create a System Restore Point in Windows 10. As always, if you have any questions, feedback, or suggestions, please don’t hesitate to reach out to us! Thank you for reading, and have a great day!