How To Change User Account Name In Windows 10
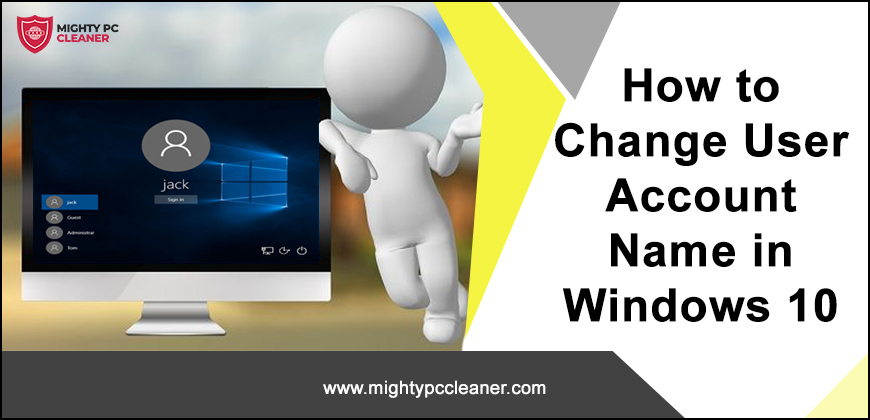
Today we will tell you the whole thing about how to change user account names in Windows 10. Changing the user account name in Windows 10 is not a big deal and most users do it easily. You can change your account name in Windows 10 by going to the Control Panel and doing settings on the left-hand side of the User Accounts applet.
However, in some windows like windows 11/10/8, people have to accept a challenge because it is not that easy to change their user account name. We can say that it is quite difficult to change the name in these Windows. This is happen because when you install Windows 11/10, there is an option to provide a name for the user account.
In this whole article, we are going to tell you how you can change the user account name of your account as well as the accounts of other users.
Change User Account Name Windows 10
For you to change your account name in Windows 11/10, follow the steps given below.
- First, you have to press the Windows + R key, then you type the control panel, and then press Enter.
- Select User Account.
- Tap on User Accounts again.
- Center of Windows 10, click or tap on the Manage other accounts.
- Choose/Select account whose name.
- Choose the account whose name you want to rename.
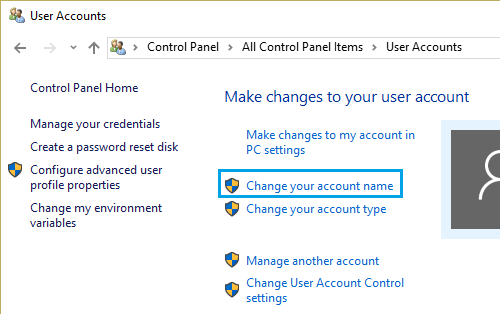
- Select the change account name.
- Select the account name and after that, click on the rename button.
- Ultimately, Restart your PC.
How to rename account name folder on Windows 10
Your username is considered your identity and we use it to sign in to Windows 10. There may be some mistakes while creating the username. There are several ways that you can fix it again. Currently, the setting does not offer you the option to edit the username. There are currently two ways to work around this limitation.
Formula1: Classic Control Panel
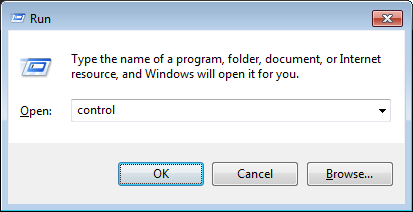
- First of all, find and open the Classic Control Panel. There is also a good way to do this, press Windows + R and type control, then press Enter.
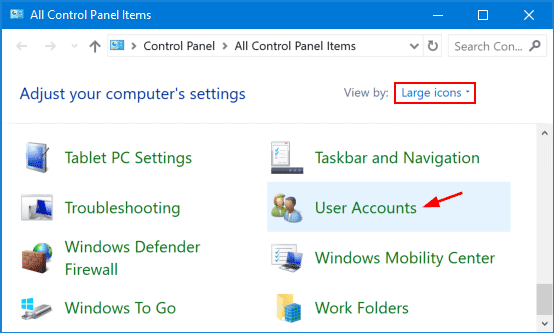
- Open the user account’s control panel, then click control other accounts.
- You should click on the account you need to edit.
- Click/Tap on Change Your Account Name.
- Now you can enter the username for the account and then click on Change name.
Formula 2: User Accounts Advanced Control Panel
This is another way by which we can change the user account name.
- Press Windows + R key and type: netplwiz or control userpasswords2 and press Enter.
- Select the account, then click Properties.
- Select General, then enter the username you want to use, click on Apply then OK, after clicking on Apply then click on OK again to confirm the changes.
How to change user folder name on Windows 10
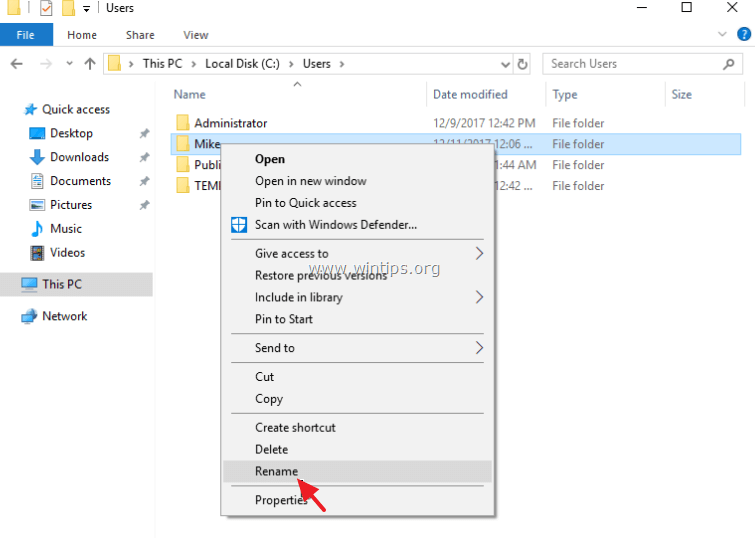
If you want to rename the user folder in Windows 11/10 then you have to follow these steps.
- Use the Registry folder.
- Open the profile list in HKLM and then double-click at ProfileimagePath.
- Then enter the new user folder path in the box and click on the OK button.
- Lastly, restart your PC.
3 Easiest Methods to Change User Account Name
If you are using windows 10 then there will be a question raised how do you change the user account name? this question is always there. If you have the same problem and want to change the user account name here is the easiest way to change user name.
Method 1: Change user account name in Control Panel
Step 1: Go to the setting.
Step 2: Select the control panel.
Step 3: Then there is an option for the user accounts and family safety.
Step 4: Choose a user account.
Step 5: Select to change the user account name.
Step 6: Enter a new name in the box and click on Change name.
Method 2: Change user account name in Local Users and Groups
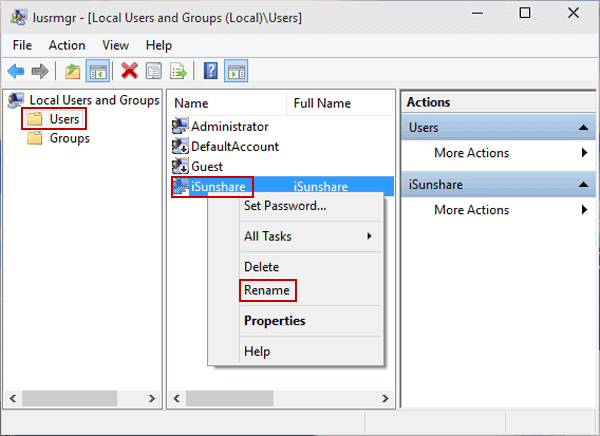
Step 1: To open Local Users and Group, press Windows + R, type lusrmgr.MSC, and then press enter.
Step 2: To rename a user, open the user folder, right-click on the user, and then select Rename from the menu.
Step 3: Enter a new name in the name box.
Method 3: Change user administrator or guest name in Local Group Policy Editor
Step 1: Open Local Group Policy Editor.
Step 2: Next, open Computer Configuration / Windows Settings / Security Settings / Local Policies / Security Options / Accounts: Rename the Administrator account or Accounts: Rename the Guest account.
Step 3: Enter a new name and press the OK button.
Method 4: Change user account name in Registry Editor
Using the Windows Registry editor, authorized users can view and modify the Windows registry. It is a hierarchical database that holds the configuration settings that are essential to the smooth operation of your system.
Step 1:First, open Run Windows.
Step 2:To open Run Windows you have to press Windows key + R and type “Regedit“.
Step 3:Type the address given below on the above search field.
“Key_Local_Machine/Software/Microsoft/Windows NT/CurrentVersion/ProfileList“
Step 4:Now you have to right-click on the account and then click on the Modify option. A new window will open where you have to type the new account name and click on the OK button.
Note: Don’t mess with the Registry because even a small error might cause serious system damage. Back up your data before modifying the registry.
How to delete an administrator account in settings
- First of all, you have to click on the Windows Start button. And this button is located in the lower-left corner of your screen and it is shaped like the Windows logo.
- Now you have to click on Settings. It’s the button that is shaped like a gear icon.
- Then later you have to choose Accounts.
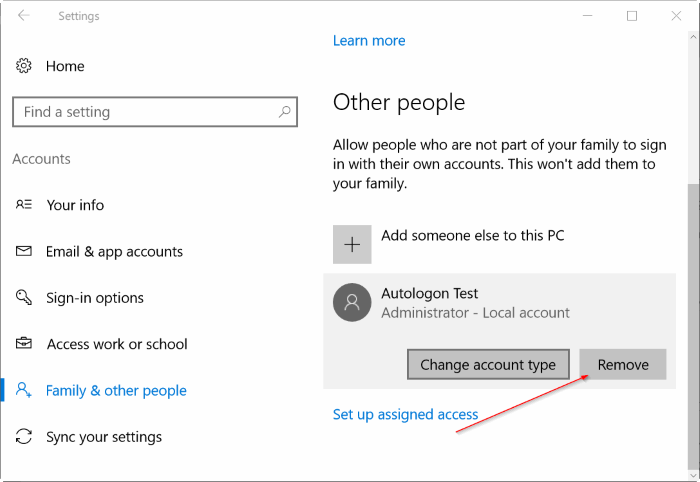
- Select the family and other users. You’ll find it in the sidebar on the left.
- You have to choose the administrator account you want to delete.
- Finally, click on Delete.
Note: Anyone using the administrator account must first sign off from the computer. Otherwise, his account will not be deleted yet.
Eventually, your account and data will be deleted. The user will lose all of his or her data if he or she clicks on it. That is why I would advise the user to make a backup of their files initially.
How to delete an administrator account in the control panel
- Click on the search button in the lower-left corner.
- Enter the Control Panel in the Windows search bar.
- Now change the scene to small icons.
- Then click on User Accounts.
- Next, click on Manage another account.
- You have to select the user you want to remove as administrator.
- Tap on the delete account link.
- Delete Files or Keep Files Choose one of these. If you select Keep files, a folder will be created on your desktop with the user’s files.
Now you know how to delete an administrator account in Windows 10.
How to remove a user account from windows 10.
One of the excellent features of windows is the ability to provide access to multiple people, each with their own login and sign-in details, folder, software, and settings. It’s simple to add new users, but if someone is not using this service longer so what do we do to remove the user? Thankfully this is also simple.
- First, you have to open the setting app.
- After opening the settings app then you have to choose the account option.
- On the left side menu, there is an option for Family & other users so you have to click on this option.
- Choose the user and click on the remove button.
- The last step is that you have to click on Delete account and data.
Lastly, if you still have any problems, you can feel free to ask in the comment section. I’m here for you. I hope you find this article very helpful and the right guide for your purpose.
How to rename user account name on Macbook Pro
There are places in each MacBook where your name or another name can appear. The account name and the name that appears in the home folder are based on the full name that you (or the administrator) gave when you first created your account.
Perhaps, IT misspelled your name when setting up your new Mac. As far as your initials and surnames are somewhat offensive, it may be time to change.
Fortunately, Apple has made it fairly simple to change the short username and home folder name from within System Preferences since the release of Macbook OS X Leopard in 2007. Changing your abbreviated username was a complicated and risky process before Leopard.
Both the abbreviation and the name of the home folder must be the same. So, if you intended to give your home directory a humorous name but wanted the abbreviation to be more formal, you’re out of luck. Despite what we said about it being a low-risk process, it is a one-time change that can result in the deletion or loss of all your data if you make a mistake. So make sure you back up first. You must be logged in to a different (administrator) account to do this. So you need to create it first.
If you ever need to create a new administrator account, follow these steps:
- Firstly, open System Preferences > Users & Groups.
- Next, click on the lock icon and type in the password.
- Click/tap the + icon.
- To change the new account to Administrator.
Conclusion
Today in this article we discussed how to change the user account name in Windows 10, how to delete/remove an administrator account, and how many ways are there to change the user account name. Changing the name of the control panel. We have explained everything to you clearly and well in this article.
We hope you enjoyed our new article post. As always, if you have any questions, feedback, or suggestions, please don’t hesitate to reach out to us! Thank you for reading, and have a great day!
