How to Check Your PC Specs in Windows 10?
If you get to know how to check your PC specs (specifications), then it could be useful for you in a couple of scenarios. Sometimes you might want to upgrade your PC, in that case, you would like to know the specifications of your current system so that you can select the relevant and necessary upgrades. Or maybe if you would be willing to sell your PC, and you want to post an ad, for that you need to know the specs of your current PC.
There could be a lot more reasons for checking the specs of your PC but whatever is your reason let us tell you that this is relatively a straightforward task and in this article, we will show you how it can be done. Knowing your PC’s configuration can help you in understanding what kind of apps are compatible with it and what apps you can run on it and which not.
On Windows 10, the ability to view a computer’s specs can be proved to be helpful in many situations. For example, it can be helpful to determine whether the device can meet the minimum requirements to install a piece of software or not. Or if the computer is not working, and you have to troubleshoot a problem or, if you are noticing the device is getting slower over time, then to find the solution to these problems, you first of all need to know all detail specs of your PC after which you could be able to find out the exact solution to your problem.
How to Check Your PC Specifications
You need to follow a few steps to check your basic computer specs in Windows 10. First of all, click on the Windows start button, then go to the Settings. In Settings, select System. After that scroll down and select the About option. From here, you will see all the detailed specifications for your processor, RAM, and other system info.
- There will be a button with the Windows logo in the bottom-left corner of your screen called the Start button. Click the Start button.
- Then go to the Settings.
- Inside Settings, click the System option.
- After this, scroll down and click on the About option from the left sidebar. You will be directed to a page where you can find details about your processor, RAM, and other info.
How to find computer hardware specifications using Settings
When you want to know about the basic hardware specifications for information such as the processor, memory, and Windows details about your system then this method is very effective and easy to use.
Steps to find computer hardware specifications using Settings
- Open Settings by using “Window + I” together or you can click on the message box that you can find at the bottom-right of your monitor screen. And then click on the Setting button.
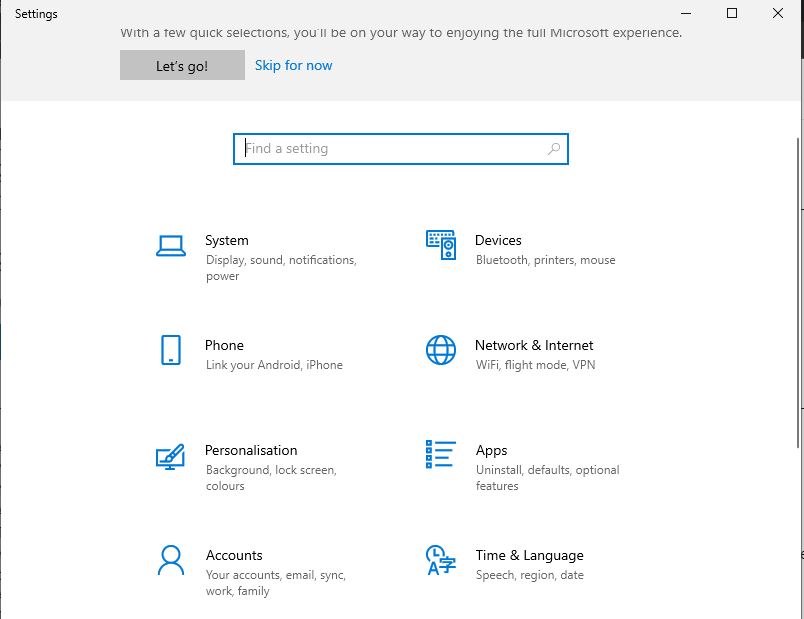
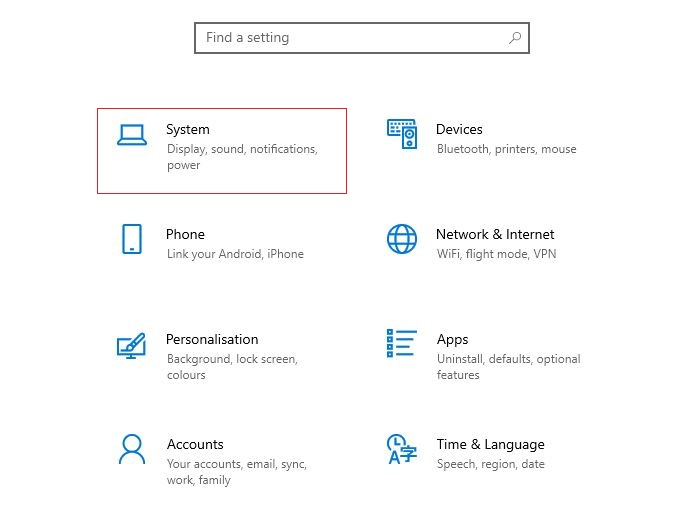
- Now, click on the System button box.
- After that, you’ll see a new window and show a sidebar at the left. From that sidebar click on the About option.
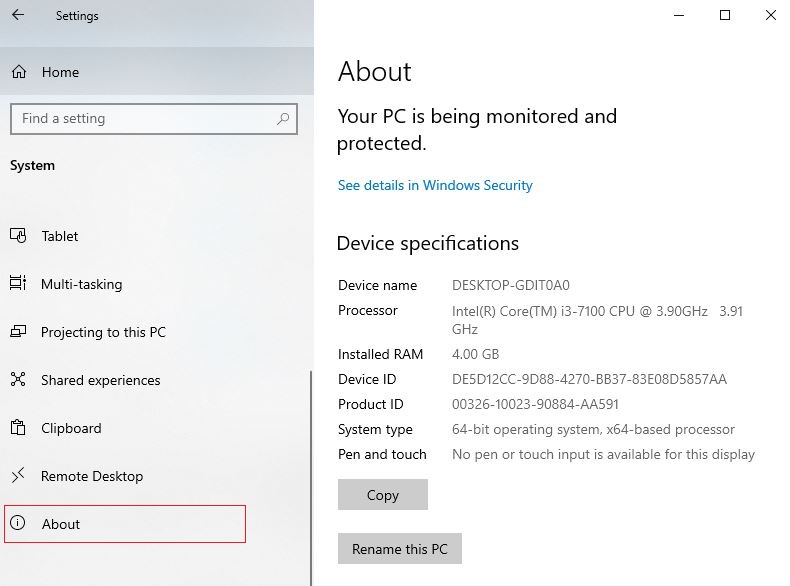
- Now on the right side, you’ll be able to see your computer hardware specifications under the Check the CPU, system memory (RAM), architecture (32-bit or 64-bit), and pen and touch support under the “Device specs” section.

- And if you want to check the Windows specifications then you can at the same window you just need to scroll down and you’ll see the Windows specifications heading. Below that heading you’ll see some tags like Edition, Version, Installed on, OS build, and Experience.
When you have completed the steps you will have a clearer understanding of the computer’s basic technical specifications. And if you want to share your system information with other people then you can copy that information by clicking on the copy button.
Check PC Specs of GPU
After knowing how to Check Your PC Specs and finding details about the basic specifications of your PC, many of you will now be willing to find out which GPU (Graphics Processing Unit) your computer has. So now under this topic, we will be discussing how to find out details about the GPU of the system. Let me tell you the happy news finding the specs of a GPU is as easy as finding the specs of a CPU. However, you will need to make an extra effort in making one additional click.
To check the detailed specifications of your GPU, follow these steps:
- Right-click the Windows icon which would be available in the bottom left-hand corner of your desktop.
- Now for the next step, click on the menu that pops up showing the ‘Device Manager’ tab.
- Click the ‘>’ arrow next to ‘Display adapters’ in ‘Device Manager.
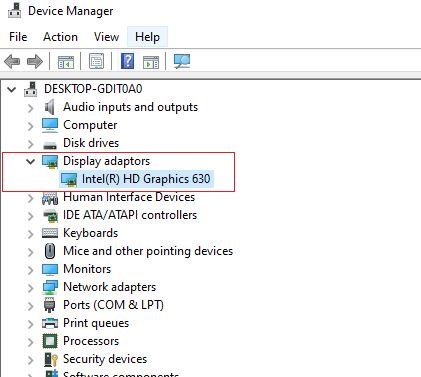
- That is it and under the drop-down, you can see the GPU that your computer is using.
Now as the previous one this is also a straightforward task. And let me mention to you that some people may experience one option but some can experience two options under the ‘Display Adapter’ drop-down menu, but there is nothing to be worried about in this. If you experience this type of case, then it just simply means that your PC has two graphics, one integrated graphics, and the second dedicated stand-alone graphics card.
The one which you need to select is the first option, which is the dedicated graphics card, which will be the more powerful of the two. And the one which your computer uses to process the graphics is the second one.
Which Motherboard do You Have on a laptop or PC?
Now if we compare it to others then it is slightly more difficult ground, but still, it is achievable. If you have a PC, then the most straightforward way to check about what motherboard it has is to open your computer and look at the motherboard itself, you will find both the brand and model number written on the motherboard itself. But if you are not familiar with the motherboard brands and not able to identify the numbers and letters mentioned on the chipset then you should go for the second route mentioned below.
You need to follow the below-mentioned steps to find what Motherboard your computer has:
- Type ‘System Information’ in the windows search tab and press enter.
- On the left-hand side of the ‘System Information’ box, you will see a highlighted tab named the ‘System Summary’ .
- Now in the list on the right-hand side, check the ‘Baseboard Manufacturer’ ‘Baseboard Model’ and ‘Baseboard Name’ which tell you every detail you need to know regarding your motherboard.
How Much Memory (RAM) Do You Have?
Now we bought another straightforward task for you that is checking how much memory or RAM your system has. Checking the specs of RAM is as easy as checking the CPU.
Follow the steps mentioned below to find what RAM your computer has:
- Right-click on the Windows tab which would be located in the bottom left-hand corner of your desktop.
- Now from the pop-up menu select the ‘System’ Tab.
- In ‘System’ when you go to the option below the CPU you will get to know easily how much RAM the computer has.
How Big Your Hard Drive Is?
As far as you check your PC specs and other parts of it is concerned, checking your hard drive is probably the easiest thing to find. Most of you would already know how to do this, but for those people who do not have any idea, they don’t need to panic. Here’s are a few steps mentioned which will make your work easier and you will get to know how to check the specs of the hard drive:
To find the storage of your PC, follow these steps:
- Open the “folder”, now click the ‘This PC’ tab on the left-hand side.
- Next, navigate to the ‘Local Disk (C:)’, there you will see that how much space your storage has and what amount of it is occupied, and what is free.
- And if more info is required, right-click the ‘Lock disk (C:)’ and select ‘Properties’.
By using DirectX Diagnostic tool how to find computer specs in Windows 10
Windows 10 contain the DirectX Diagnostic Tool which allows you to view information about DirectX sound and visual support and it is a tool in Windows 10 that is typically used to troubleshoot certain system issues. To use the DirectX Diagnostic Tool to check the machine requirements, follow these steps:
- Click on the start button.
- On the search tab, you have to search dxdiag and then go to the top there is an option for DirectX Diagnostic Tool click on it.
- Click on the System tab.
- Read the computer tech specs in the “System information” section, which provides the system specifications such as system manufacturer, system model, BIOS, processor, RAM, Windows 10 version and edition, and more.
- On the right side of the system tab, there is a display tab click on that.
- Under the display, there is a device section where you can find out graphics card technical specs such as manufacturer, chip type, device type, display memory, display memory, shared memory, current display mode.
- If you want to save the information then you have to click on Save All Information button.
- Choose a folder location.
- Confirm a descriptive title for the report, such as “Windows 10 PC specifications.”
- Save by clicking the Save button.
- Start the File Explorer application.
- Navigate to the exported data folder.
- To view the exported system information, right-click the text file and select the open option.
When you finish the steps, you will get a text file that is properly formatted and contains all of the computer hardware and software details.
Use PowerShell to find computer specs
You may also use PowerShell to find out the technical specs of your device. Here are the steps you can follow to find computer specs by using Powershell.
- On the search bar type Powershell
- Open Run as administrator.
- Press enter after typing Get-ComputerInfo.
Use Command Prompt to find computer specs
This is an important Command Prompt command to know because it is one of the quickest ways of determining the specs of your system. It allows you to see even more hardware and software details than the app’s UI version. The following are the methods you can take to get computer specs using Command Prompt:
- On the search bar type Command Prompt.
- Choose the Run as administrator option.
- Enter the command systeminfo or Get-Computer at the command prompt.
- All the information you get when you finish the steps, the command output will show you such as computer’s hardware and software and update the information of windows 10.
Conclusion
If you’re running into problems with your computer’s performance, you’ll need to know what your computer’s specifications are, so you can search for solutions that match your computer’s hardware. In this article, we have mentioned various steps to Check Your PC Specs in Windows 10. This article contains different topics which include how to check your computer specs and all other detailed specs of the PC whether it is CPU details, or about GPU, or details about motherboard, memory (RAM), hard drive, etc. We hope that we made our points clear to you and you got answers to all your queries.
We hope you enjoyed our blog post about how to check your PC specifications in windows 10. As always, if you have any questions, feedback, or suggestions, please don’t hesitate to reach out to us! Thank you for reading, and have a great day!